Wireless Screen Sharing for People on the

KLIKStik GO! redefines wireless screen sharing with an affordable, portable solution. Project video from personal devices to large screens without complex setups or costly hardware. Experience truly effortless screen sharing!

High Performance

Experience reliable, impeccable real-time audio and video streaming in full HD, with zero stuttering or delays, at distances of up to 20 meters between your device and the TV.

Simple to Use

Simply connect the receiver to any TV with an HDMI port and attach your preferred HDMI or USB-C transmitter to your device There's no setup or configuration required.

Accessible

Compact enough to fit in your pocket, lightweight to ensure you won't feel burdened, and budget-friendly so you can add one to every screen in your office, classroom, or home.

Affordable Screen Sharing That Works Everywhere. Let’s GO!

The Secret is Simplicity

GO! is ready when you are. Simply plug the receiver into any display and the sender into your device. That’s all it takes to share content from your device to the big screen.

  • No Apps to load,

  • No Network to connect to,

  • No Setup required,

  • No Security Issues to worry about,

  • No Instructions to wade through,

  • No Glitches to disrupt your flow,

  • No Excuses to your audience,

  • No Limbs to sacrifice,

  • It Just Works!

Enjoy flawless audio and video transmission in full HD, without stuttering and delay, up to 20m* between your device and the Display.

INSTRUCTIONS:

  1. Plug Receiver into Display.
  2. Plug Sender into your device.
  3. GO!

* As with all wireless products, range varies with transmission distance, physical obstacles, local wireless and electromagnetic interference, and other factors. Best performance is line-of-sight.

Learning and Working places are more productive with GO!

Bring ideas to life by instantly sharing them to the screen. GO! allows everyone to participate in the conversation without complicated setup or configuration. Completely hardware-agnostic, GO!

Peer-to-peer connectivity means that GO! delivers impeccable wireless performance without connecting to a network.

Since there is no software or drivers to load, GO! works with any OS.

USB-C or HDMI Senders for use with any Device, not just computers.

USB-C Sender is ideal for use with MacBook*, iPad*, iPhone*, Android, Windows, Chrome & Linux devices supporting Alt-mode video.

Off-site meetings are more productive with GO!

No need to stress about the screen-sharing tech at your destination, just bring your own, get there, and GO!

No Apps

No Wi-Fi

No Settings

No Network

No Adapters

GO! is completely self-contained and ready to share your screen in seconds. Take it with you to business meetings, then relax and watch what you want in the hotel. GO! works everywhere.

Guests visits are more efficient with GO!

Save time, frustration and expense. Simply hand guests a sender and they’ll be sharing content immediately.

GO! senders are available in both USB-C* and HDMI versions, covering nearly any computer, tablet, smartphone, or other video device.

Guest users can share content without breaking a sweat.

GO! works with any HDMI-equipped video device, so document cameras, digital signage players, and even camcorders can stream wirelessly.

* USB-C senders require that the device support video over USB-C in Alt Mode. Check with your device manufacturer to confirm compatibility.

Home video screens are more flexible with GO!

Stream video from a mobile device, a PC, or even your favorite streaming adapter.

Watch what you want, when you want, where you want, with GO!

Whether you’re at home, or on vacation, bring your content with you and enjoy it on any TV.

Join a workout session, catch a movie, or share photos and video with friends from your device and GO!

* Streaming services shown are indicative only. KLIK is not affiliated with, nor endorsed by these or other brands. Logos are the property of their respective owners.

Finally, a professional screen sharing system good enough for movies.

* Streaming services shown are indicative only. KLIK is not affiliated with, nor endorsed by these or other brands. Logos are the property of their respective owners.

Finally, a professional screen sharing system good enough for movies.

Now, choose the right combination andGO!

One Display, or Two?

This is easy, choose the 1×1 if you have only 1 display, otherwise choose the 1×2 for 2 displays.

The 1×1 kit is expandable by adding up to 3 additional senders; either USB-C or HDMI.

The 1×2 kit includes a USB-C sender. An optional HDMI sender can be added in its place.

HDMI, USB-C, or Both?

Add or substitute the right combination of senders to further customize your system.
Select any combination of USB-C or HDMI senders to expand the 1×1 kit to a 4×1 system.
An optional HDMI sender may be added and used in place of the supplied USB-C sender.
Build the Ultimate 4×2 system with GO!

This is just one of many configurations that are possible by combining 1×1 and 1×2 systems. Design what do you need to do with GO!

Connect* a 1×1 Receiver to a 1×2 Sender to create a system that can support up to 4 users, sharing to 2 displays.

Specifications

  • Full-motion wireless Video Transmission

  • Effective range of up to 30 meters

  • Ultra-low latency suitable for gaming & presentations

  • Portrait/Landscape orientation selection for use with mobile apps & devices

  • Full-HD, 1080p video resolution

  • USB-C Senders powered by host device

  • HDMI Senders & Receivers powered by USB; cables included

  • PD power passthrough on USB-C Senders

  • Single LED indicator for power status

  • Pushbutton starts/stops transmission

  • Simple pairing requires no apps or tools

  • Fully plug & play, no setup needed

  • USB-C works with Display-port in Alt-mode

  • 2-Year Limited Warranty

Features & specifications are subject to change without notice.

Download the Brochure

Learn more about KLIKStik GO

Make it simple, how does the KLIKStik GO work?

Here’s the simple answer: KLIKStik GO replaces the cable that normally connects your phone, tablet, laptop, or other video output to your TV.

And here’s the back-story:

Why Does it Replace the Cable?

  1. Because cables are a pain! Do you really want to get in behind the TV every time you want to connect a new device to it in order to watch something? And, are you sure you have all the right combination of cables to connect all of the devices that need to connect? Like USB-C, DisplayPort, Mini DisplayPort, Mini HDMI, etc. And nobody wants cables running all over the place; not only are they pose a trip hazard, they’re also a visual blight. With GO, you can ditch the cable collection altogether.

  2. Because cables are restrictive. You know the drill, everyone has to take a turn in the presenter’s seat because the cable doesn’t reach every seat. The constant musical-chairs dance not only wastes peoples’ time, it actually costs money. Save money, save time, and eliminate frustration by simply passing the GO to the next presenter, no matter where in the room they’re seated.

How does it replace the cable?

  1. Every GO system consists of at least two pieces; one Transmitter, also abbreviated as Tx, and one Receiver, aka Rx.

  2. As might be obvious by now, the Tx plugs into the source of the video–a smartphone, tablet, laptop, camera, visualizer–anything that delivers video on either a USB-C video or HDMI output.

  3. And of course, the Rx connect to where you would normally connect the video cable; the TV, Monitor, Projector or Video Wall where you intend to display what’s coming from the source of the video.

  4. Once everything is connected, the video flows from the source to the display wirelessly, effectively replacing the cable.

A couple more things you need to know is just how it all works when everything is connected.

  1. The GO system offers a total of three components. Two are Tx, and available as USB-C or HDMI. That means you can configure your system with the right transmitters to match the sources you use. The third is an HDMI Rx that receives the video signal.

  2. The USB-C Tx is powered from the host that it plugs into, right over the same cable that makes the video connection. It also has a USB-C socket that allows connection of a standard USB-C PD power supply that powers the Tx and also charges the host device. That way, you can use a laptop, tablet or phone all day long, and never run out of juice.😊

  3. The HDMI Tx comes with a short USB Type-A cable (what we generally call a ‘standard’ USB power cable) that can be connected right to any USB port on a laptop or external power adapter for a phone.

  4. The same applies to the HDMI Rx, it also comes with a USB power cable. Most displays have a USB socket available to supply power to the Rx. Again, if your display lacks a USB power port, just use a standard USB power supply.

Okay, everything is connected and powered on, now what?

  1. Turn on the TV, and if everything is turned on, you’ll see the GO welcome page on the screen.

  2. Now pull up the content you want to share on your device and press the button on the Tx.

  3. Success!!! Video is now streaming from your device to the TV!

Now that you know both the sort and (very) long answers to how GO works, be sure to check out some of the other FAQs and learn all about what makes GO the best choice for any application where you want to share video wirelessly.

Great question!

Let’s say that your users have the latest devices, iPhone 16, Galaxy Z Fold 6, MacBook Pro, or Dell Inspiron 16 laptop. You’re going to need a USB-C sender. That’s great news, because the USB-C Tx is a single-cable solution that can draw its power from the host device, so it’s truly plug (once) and play.

But what about those legacy devices that have an HDMI video output?

Well, there are two choices here.

  1. Get an HDMI Tx, pair it to your Rx, and you’re all set. Just keep in mind that the HDMI Tx needs a power connection, so it needs to plug into a USB-Type A (standard USB) socket or power supply.

  2. But wait, there’s another clever alternative. Get one of our KLIK HDMI to USB-C adapters and plug your existing USB-C Tx into it. It sounds complicated, but it is straight-up simple. (We’ll add a picture soon).

Now, here’s another twist. Why not pair multiple Tx to a single Rx, so you’re ready to accommodate any user device? Good news, the 4×1 version of the GO system allows up to 4 Tx units to be paired with 1 Rx. The Tx can be either USB-C or HDMI, so for example, you could have 3x USB-C and 1x HDMI, or 3x HDMI, and 1x USB-C, or…

Of course if you have the 1×2 version of the GO system, you’ll need to use either the supplied USB-C Tx or the optional HDMI Tx. Switching between the two requires re-pairing the Tx to the Rx units, so it’s best to think this one out before deployment. Or contact us for help by visiting https://klikboks.com/support to get more answers, or speak with a real, live, human!

Another great question, and we’re so glad you asked.

GO is available in two flavors:

  1. The 1×2 version is specifically designed to allow one source to be sent to two displays. The transmitter (Tx) can be either USB-C or HDMI, depending on the selected kit, and the receiver (Rx) is always HDMI. This system sends the same signal from one device to both TVs at the same time. Switching between Tx requires re-pairing both Rx, so it’s best to decide which one you need most before purchase. The 1×2 system is not expandable.

  2. The 4×1 version is designed for applications where you expect to have multiple users sharing one display. Pair up to 4 Tx of either USB-C or HDMI versions to the single HDMI Rx, and you’re all set. Up to 4 users can have a Tx connected to their device, and be ready to start streaming once the system is available. Only one user can stream at a time, so this system is best suited to use by people who get along. At least a bit.

Okay, now that you know there is a system option made for two displays (TVs), you ca simply choose the 1×2 kit and you’re done. Right? Oh no, the lads at KLIK Engineering have another trick up their sleeves.

What if you need 4x Tx and 2x Rx, to feed two different displays from 4 users? Check out our FAQ for System Expansion to see how this and other configurations are possible with GO.

*** WARNING: TECHY TALK AHEAD. PROCEED WITH CAUTION ***

Ah yes, the Maverick. Not satisfied with the status quo, pushing the envelope, breaking new ground. Welcome, nerd spoken here.

Think of GO as a group of building blocks that can be put together as needed to meet a specific need. Sure, there are limitations, but there are some pretty powerful solutions possible with just a few combos. Here we go, from the simple to the sublime:

  1. 1×1 USB-C (or HDMI) to HDMI: This is the perfect myGO combo, that lives in your backpack, ready for action at the drop of a hat. Combine it with a small power bank and use the rig without AC or a USB power source for the Rx (receiver). Add up to 3 more Tx (transmitters) at any time, in either USB-C or HDMI. Sweet.

  2. 2x USB-C + 2x HDMI to 2x HDMI: This is the GOAT of GO systems, doing the impossible task of expanding to where no expanded configuration is otherwise possible. Here’s the trick, you’re combining a 4×1 system with a 1×2 kit. Connect the HDMI Rx from the 4×1 kit to the HDMI Tx from the 1×2 kit, and you’re all set. Now you might wonder “is this even possible?” or “do I need an engineering degree to make it work?” and the answers are Yes, and No.

What you cannot do is intermix 4×1 and 1×2 components into the same system. There are technical reasons for this, so please don’t burn the midnight oil trying to pull it off. But somewhere between the humble 1×1 and omnipotent 4×2, there is a solution for a great many challenges, and an opportunity for recognition of ingenuity. Let us know what crazy configurations you’ve com up with right here.

Great question, worthy of an explanation.

First, let’s review the difference between the 1×1 and 1×2 kits.

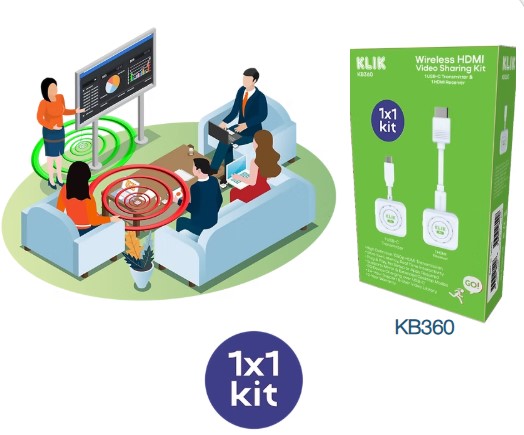
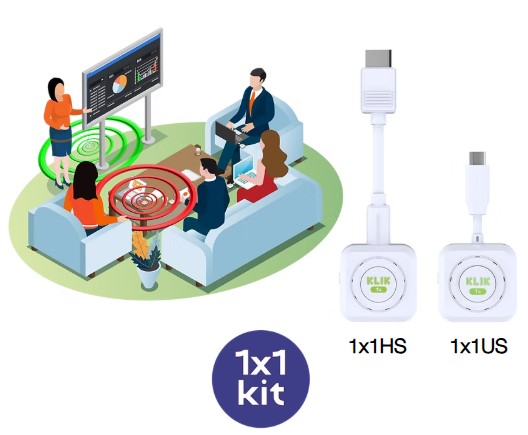
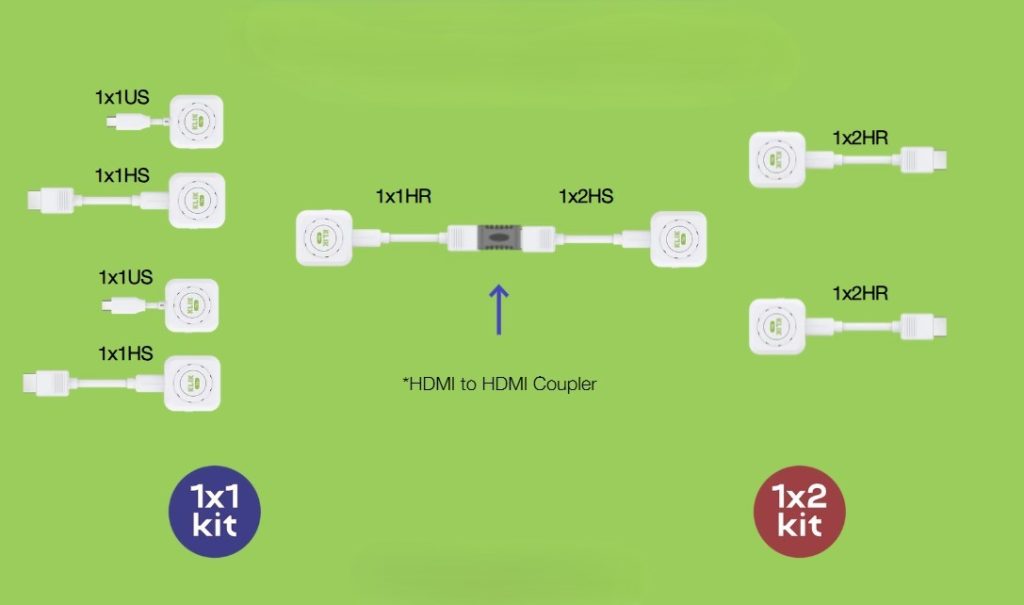
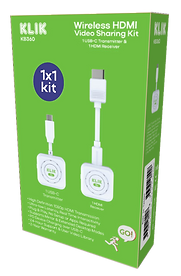
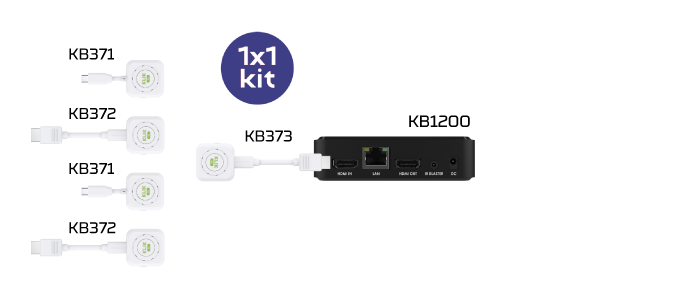
  • The 1×1 kit consists of 1 sender and 1 receiver. However, it can be expanded all the way up to 4 senders, but always to only one receiver.

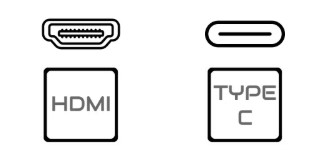
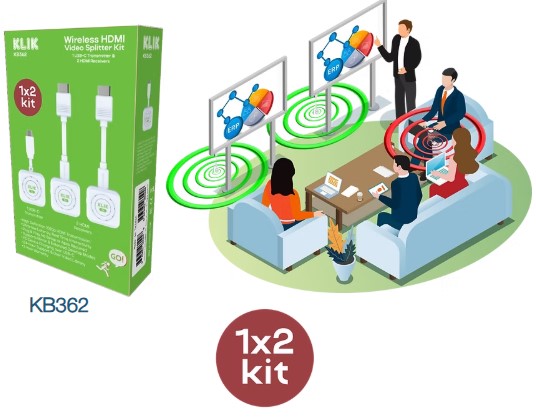
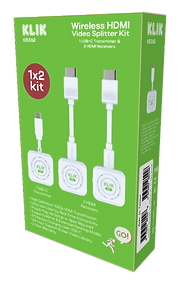
  • The 1×2 kit consists of 1 sender and 2 receivers. This kit is not expandable, but the supplied USB-C sender can be replaced with an HDMI sender. Still, only 1 sender to 2 receivers.

So, who would choose the 1×1 kit versus the 1×2 kit? Or the other way around?

  • The 1×1 kit is best suited to users who only ever have to share content to 1 screen. That’s most meeting rooms, classrooms, and living rooms; 1 screen to show your content on.

  • The 1×2 kit is best suited to users who either have 2 screens in their setup, or those who often make presentations to larger groups. More on that later. 1

“What if I need 3 senders and 2 receivers?” you might ask. Well, you can actually combine a 1×1 kit with a 1×2 kit and achieve up to a 4×2 system. More on that later as well. 2

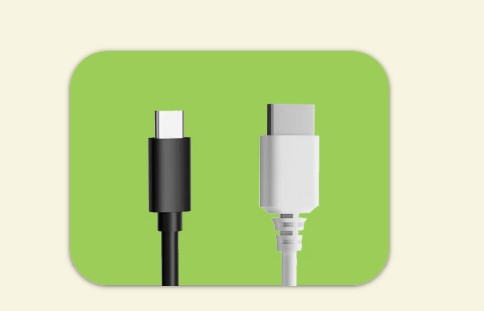
Now that we see the difference in the kits, let’s see how the components differ.

Yes, they all look the same, and work the same. But the USB-C Sender for the 1×1 kit is different from the USB-C Sender in the 1×2 kit. And so are the HDMI senders, and HDMI receivers; they’re all different. One is designed for multiple senders, and the other for multiple receivers, hence they are different and not interchangeable.


And this is how that breaks down at the component level:

Family

Model

Description

Application

1×1

KB371

USB-C Sender

Supplied w/1×1, & Sender Expansion

1×1

KB372

HDMI Sender

Sender Expansion

1×1

KB373

HDMI Receiver

Receiver Replacement

1×2

KB381

USB-C Sender

Supplied w/1×2, and Replacement

1×2

KB382

HDMI Sender

Sender Replacement

1×2

KB383

HDMI Receiver

Receiver Replacement

1 When we say that the 1×2 kit is suited to those who make presentations to larger audiences, there are two distinct applications that we’re referring to:

  1. In applications where the room is sufficiently large or shaped in such a way that the audience cannot see a single screen, organizers will typically set up a second screen. This often involves added equipment to split the signal, and messy cabling run across the floor. The 1×2 kit solves both issues.

  2. In applications where the presenter is standing in front of a large screen, facing the audience, they cannot see their presentation slides. In those circumstances, a smaller display is placed in front of the presenter (usually on the floor) to act as a “confidence monitor.” The 1×2 kit is perfect for this arrangement because it greatly simplifies setup and cabling.

2 Most users can select between the 1×1 or 1×2 kit and never need to expand. However, those who need more senders and two receivers have a way of combining systems to make that happen:

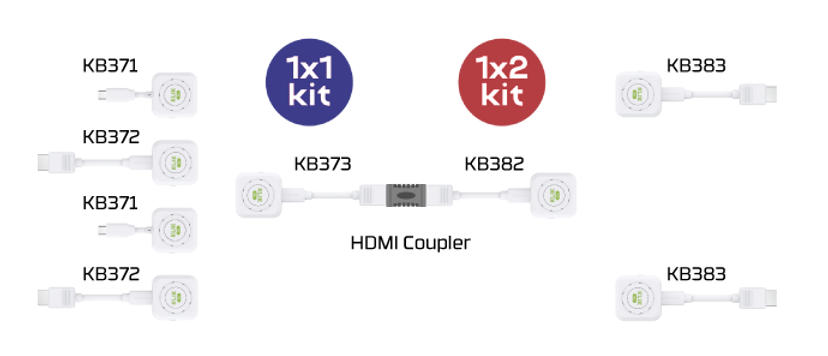
  1. Just connect the 1×1 HDMI Receiver to the 1×2 Sender. Yes, it’s as simple as that. If you already have two kits (or are borrowing one kit from a friend), just make sure that you have a KB382 HDMI Sender on hand for the 1×2 kit. Then, just connect the KB373 HDMI Receiver to the KB382 Sender, using an HDMI-F Coupler.

  2. If you’re starting from scratch, you can also select the components you need individually. Just start with the KB373 HDMI Receiver, and the KB382 Sender, then add up to (4) 1×1 Senders and (2) 1×2 Receivers.


KLIKStik GO Expanded to 4×2

Nope. (Well, at KLIK we never say never, so read the footnote below 1.)


GO is a system designed for a specific purpose; low-cost, simple, and rock-solid wireless video for the rest of us. HUB is the 800-pound gorilla of the collaboration world, with features unmatched by any other system. And, while we’re big on cross-platform compatibility at KLIK, these two platforms are different.


KLIKBoks HUB uses an equally clever hardware Tx (sender) that accepts video sources from USB-C or HDMI sources. Check out the KLIKLink AV (KB462A) here.


1 And for those who will always find a way, an emphatic YES to using a GO system with a HUB system. Read on, fellow mavericks.


You already know that the KLIKBoks HUB offers an HDMI input, right? Well, it does. And the way it’s designed, the HDMI input can accept video (and audio) from any HDMI source, then display it alongside any other content on the split-screen or full-screen display.

Now, what happens if you connect a 1×1 kit HDMI receiver to the HUB’s HDMI input? Well, you have just enabled the simplest and most cost-effective way to add more users to your system. Clever you!

KLIKStik GO Feeding KLIKBoks HUB